Welcome to Sino Bearings web
24x7 HOTLINE:+86-28-81454188

 TECHNOLOGY
In today’s industrial environment, while the adage “If it ain’t broke, don’t fix it” is well-known, it has become common practice to implement preventative maintenance inspection plans for operational machines. Scheduled maintenance for these machines doesn’t have to be a daunting task for Plant Engineers, and Miba’s collective experience offers valuable information to help ensure the proper functioning of machines and the hydrodynamic journal bearings inside them.
 There are many types of bearings developed over the years based on application and the manufacturer. This article will be focused on U.S. style hydrodynamic pivoted shoe journal bearings.
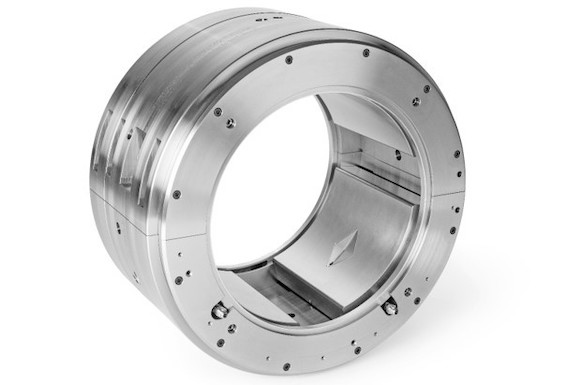
Hydrodynamic pivoting shoe journal bearings are widely used in turbomachinery, particularly in power plants. In our case, the journal bearing consists of a rotating journal inside the bore of a hydrodynamic bearing. The pressure developed in the variable-shaped converging wedge filled by a lubricant film supports the load between the rotating journal and the pivoting journal shoe. Components of a typical hydrodynamic journal bearing are shown as follows:

Maintenance of the hydrodynamic pivoting shoe journal bearing begins before the bearing is removed from the machine. If available, locate the Original Equipment Manufacturer’s (OEM) Installation and Operation Manual.
Once the pivoting shoe journal bearing is accessible in the machine a visual inspection should occur.
Depending on the time and expertise available, a crush check to quantify the bearing to case fit and a field lift/bump check to quantify existing bearing clearance can be performed. After the visual inspection and field checks are complete prepare a work area that is free from debris with adequate space to lay out the bearing and components
During inspection, four key areas should be checked for wear:
Check the babbitted surface of the pivoting journal shoe. Replace any shoe with scored or deeply scratched babbitted faces or signs of wear. Lightly scrape with a sharp scrapper if no wear is detected. Replace temperature detectors showing wear in the wire coverings. Inspect the bore of the seal rings. Replace rings with oversize bore diameter. Check for nicked edges, deep scratches, or scoring on the bore and face before re-installing. Polish if burrs or raised edges are present. Inspect the pivoting surface of the journal shoe and seat in the retaining ring for scratches, scoring, or erosion. Polish if necessary. Carefully re-assemble bearing halves, ensuring correct orientation and match-marked journal shoes. Check the running diametral clearance and replace the bearing if it exceeds the maximum design clearance. Disassemble the bearing to separate upper and lower halves.Prior to re-installation of the bearing assembly, inspect the bearing cavity and cover for cleanliness. The final step is to inspect the bearing assembly. This is done by checking each journal pad for freedom of movement and placing the lower half of bearing assembly with lower half of seal rings and open garter springs in bearing housing or on top of shaft and roll into place.
To read the full whitepaper with more details click on the link.
Thomas Stietz
Engineering Manager US
DISCLAIMER:
NO WARRANTY OR GUARANTEE, EXPRESS OR IMPLIED, IS MADE WITH RESPECT TO THE PRODUCTS, DESIGNS, DATA, INFORMATION DESCRIBED, OR ANY INTELLECTUAL PROPERTY CONTAINED THEREIN. ANY WARRANTY OR GUARANTEE OF MERCHANTABILITY OR FITNESS FOR A PARTICULAR PURPOSE IS ALSO EXCLUDED.